Share
Share

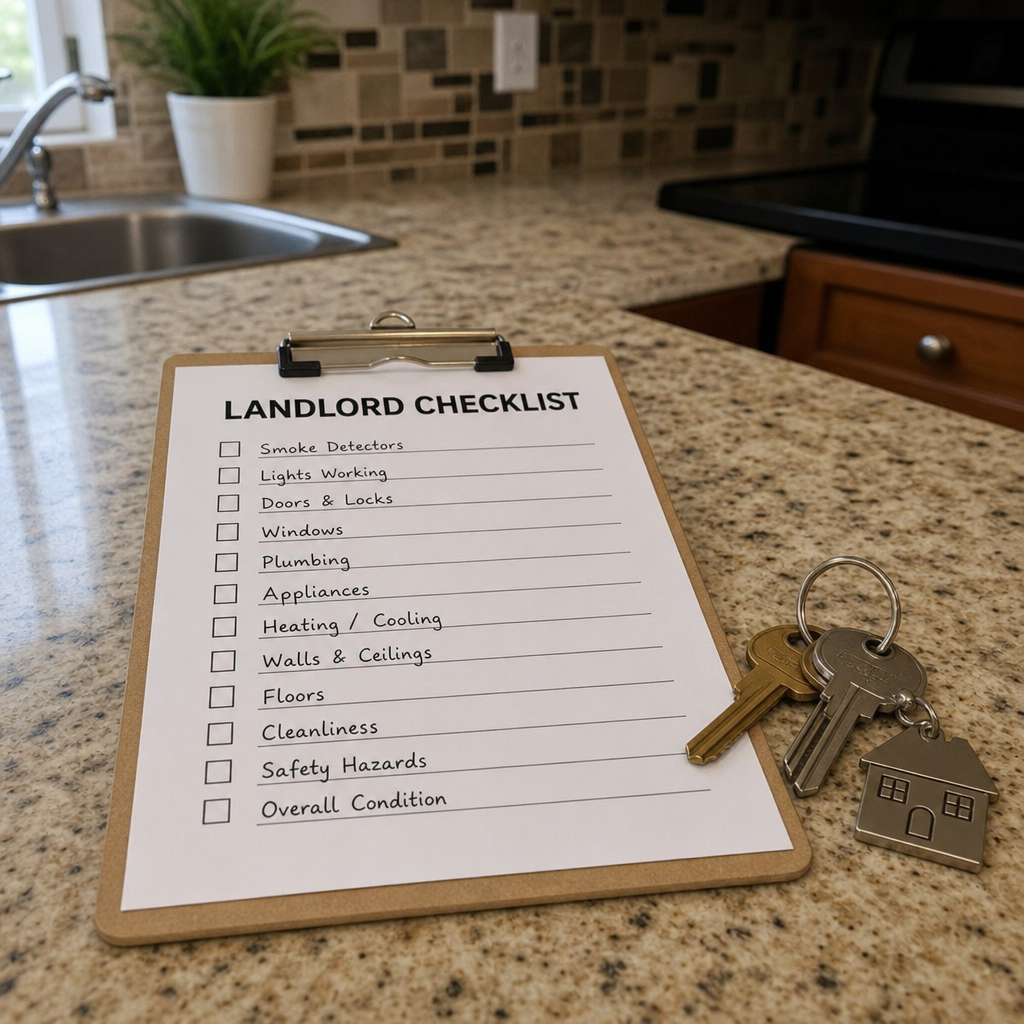
Preparing a home, apartment, or multi-unit property for tenants takes more than a quick clean and a rent sign. A well-prepared rental can bring in better applicants, cut surprise fixes, support good tenant ties, and make tax time easier for a new landlord.
This guide covers the 7 essential steps to prepare your property for renting from start to finish. If you are turning a former home into a rental, opening your first investment property, or getting a unit ready between tenants, a clear order helps you miss less and stress less.
Step 1: Inspect the property from the outside in
Start with a full check before you spend on upgrades, cleaning, or ads. The goal is to find safety risks, repairs, and looks-only issues in the right order.
Begin outside. Walk around like a first-time renter. Check the roof, gutters, siding, windows, doors, steps, walkways, fence, driveway, yard, exterior lights, and shared access areas. Look for safety issues, leaks, curb appeal problems, and long-term repair risks.
Then move inside. Test doors, windows, locks, lights, outlets, appliances, faucets, toilets, heat, cooling, smoke alarms, carbon monoxide detectors, and airflow. Open cabinets, closets, and utility spaces. Look for leaks, stains, pests, loose parts, cracked tile, soft floors, peeling paint, and heavy wear.
As you inspect, sort your notes into three groups:
-
Safety and use issues: Items that must be fixed before move-in, such as broken locks, exposed wiring, missing detectors, leaks, pests, or unsafe stairs.
-
Functional repairs: Items that affect daily use, such as bad appliances, dripping faucets, loose handles, damaged screens, or doors that do not close right.
-
Cosmetic improvements: Items that make the home look better, such as fresh paint, new hardware, better landscaping, or modern lights.
Take photos and videos before repairs. This gives you a record of the home's condition and helps with insurance, upkeep, and move-in notes. If you are new to being a landlord or major systems have not been checked in a while, hire qualified pros for the roof, HVAC, plumbing, electrical, or structure.
A careful inspection helps you avoid spending money on looks while missing issues that could lead to complaints or legal trouble later.
Step 2: Complete repairs and put safety first
Once you have your notes, do the work in order. Safety first. Then function. Then looks.
Make sure every outside door has a working lock and that reachable windows latch securely. For a landed house, replace missing or faulty smoke alarms yourself; for a strata unit, fire detection is usually a centralised system managed by the JMB or MC, so check with them instead of buying your own. Either way, make sure any gas water heater is properly ventilated - carbon monoxide poisoning from gas heaters in poorly-ventilated bathrooms is a real, documented risk in Malaysia. Fix trip hazards, broken rails, loose steps, exposed wiring, leaking pipes, mold, and pest entry points. If there is a garage, basement, deck, balcony, fireplace, pool, or other higher-risk area, give it extra care.
Then handle the systems and appliances tenants use every day. Heat, cooling, hot water, plumbing, electrical service, kitchen appliances, laundry gear, and basic lighting should be clean, safe, and working. If an appliance is near the end of its life, decide if repair or replacement is the better long-term move. A slightly higher upfront cost may cut emergency calls after move-in.
For cosmetic work, choose durable materials that are easy to keep up. Rental homes do not need luxury finishes, but they should feel clean, neutral, and well kept. Consider:
-
Washable, neutral wall paint
-
Scratch-resistant flooring where practical
-
Simple, sturdy cabinet hardware
-
Easy-to-replace blinds or window coverings
-
LED bulbs and useful lighting
-
Low-maintenance landscaping
-
Durable caulk and grout in wet areas
Avoid overdoing upgrades beyond what the market will pay for. The best updates are the ones that cut upkeep, improve safety, and make the property show well in photos and tours.
Keep receipts, invoices, warranties, before-and-after photos, and contractor details as you finish the work. These records help with future upkeep and rental property tax preparation. Some costs may need to be handled differently for tax purposes, so keep your files in order and ask a tax pro for advice if needed.
Step 3: Deep clean and prepare the property for move-in
A clean rental sets the bar. If tenants move into a spotless home, they are more likely to respect the standard on move-out. If they move into a dusty or stained place, later disputes are harder to manage.
Do the deep clean after repairs are done. Dust, paint bits, and repair mess can undo earlier cleaning, so leave the final clean for last.
Focus on the areas tenants notice most:
-
Kitchens, including inside cabinets, drawers, oven, refrigerator, range hood, sink, backsplash, and counters
-
Bathrooms, including toilets, tubs, showers, grout, mirrors, exhaust fans, vanity drawers, and fixtures
-
Floors, including carpets, tile, wood, vinyl, baseboards, and corners
-
Windows, tracks, blinds, screens, and sills
-
Closets, shelves, storage areas, and utility rooms
-
Light fixtures, ceiling fans, vents, switch plates, and outlet covers
-
Entryways, patios, balconies, porches, garages, and shared spaces
If the property has carpet, decide whether a deep clean is enough or if you need new carpet. Smells, pet damage, and heavy stains can cut the value of the rental. Odor control matters because prospects often remember a bad smell more than a good upgrade.
Do not forget the outside. Power wash where needed, clear cobwebs, trim overgrown plants, clean porch lights, remove trash, and make sure bins are clean and ready if they stay with the rental.
Before listing, do one last walk-through and ask yourself if you would feel good handing over the keys today. If the answer is no, finish the remaining items before showings start. A half-finished home can make prospects wonder if the work will really get done before move-in.
Step 4: Understand legal requirements before advertising
Before you list the rental, learn the rules that apply to your property. Rules can be set federally, by state, or by local council, and can vary by property type, so do not rely on generic advice alone. A landed house, condo, duplex, short-term rental, low-cost unit, or property managed by a Joint Management Body (JMB), Management Corporation (MC), or residents' association may have different rules.
Research rules for:
-
Short-term rental or homestay registration with the local council or MOTAC, if relevant (ordinary long-term tenancies generally don't need a rental licence in Malaysia)
-
Occupancy limits
-
Security deposits
-
Required disclosures
-
Non-discriminatory advertising and screening practice (Malaysia has no fair-housing law yet, though KPKT has proposed one - consistent, objective criteria still reduce disputes)
-
General condition and safety checks for older properties (Malaysia has no lead-paint-style disclosure law; flag any legacy building-material concerns to a professional)
-
Fire and gas safety requirements (usually a centralised, JMB/MC-managed system for strata units; landed-house landlords should check smoke alarms and gas water heater ventilation themselves)
-
Livability standards
-
Notice requirements
-
Lease clauses that are restricted or banned locally
-
JMB/MC or residents' association rental rules, if applicable
-
Short-term rental limits, if relevant
Malaysia doesn't have a fair-housing law the way some countries do, but treating every applicant the same way still matters most in ads and screening. Keep your listing, photos, application process, and screening criteria focused on the property and objective criteria, not personal traits. Use the same rules for every applicant and keep records of your process - it's simply good practice and reduces disputes.
If you are not sure about lease wording or local rules, talk to a qualified landlord-tenant lawyer or a trusted local housing group. A generic online lease may miss local rules, and an invalid clause can cause trouble later.
You should also think about insurance before move-in. Fire insurance is effectively required - your bank will require it if there's a mortgage, and for strata properties the MC is separately obliged to insure the building itself. On top of that, ask about landlord-specific cover for tenant default, malicious damage, and legal costs, and consider requiring your tenant to hold contents insurance for their own belongings, since a US-style renters insurance policy isn't a standard product in Malaysia. If you do require tenant insurance, say so clearly in the lease and onboarding steps.
This step may not be as visible as cleaning or repairs, but it is one of the most important parts of responsible rental property preparation. A legal base protects both you and your tenants.
Step 5: Set a competitive rent and create a strong listing
Setting the right rent helps cut vacancy while protecting your return. If rent is too high, the property may sit empty. If it is too low, you may leave money on the table and get more inquiries than you can handle.
Research nearby rentals. Look at homes with similar bedrooms, bathrooms, size, parking, outdoor space, condition, amenities, school district, commute access, and pet policy. Watch listings to see how long they stay active. A pretty listing at a bad price is not a real market sign.
When you set rent, include your full ownership costs, such as:
-
Mortgage payments, if applicable
-
Property taxes
-
Insurance
-
Maintenance fees and sinking fund (JMB/MC), or residents' association fees
-
Utilities you will pay
-
Routine maintenance
-
Landscaping and monsoon-season upkeep (clearing gutters and drains before the wet season)
-
Property management fees, if applicable
-
Vacancy allowance
-
Cash set aside for big repairs
-
Tax prep and bookkeeping costs
Then decide how your property will compete. You may not need to be the cheapest if the home is clean, well kept, easy to reach, and well shown. If the property has fewer perks than nearby homes, price it that way.
Your listing should be clear, true, and easy to scan. Put the basics first: bedrooms, bathrooms, general area, parking, laundry, appliances, outdoor space, pet policy, utilities, lease length, deposit, and move-in date. Then highlight the features that matter most to your renter.
Good listing copy is specific without hype. Instead of saying amazing kitchen, say what the kitchen has. Instead of saying great location, mention nearby transit, roads, parks, employers, or shopping in a plain way. Avoid hype that could disappoint prospects during showings.
Photos matter as much as the words. Use bright, clear images taken after cleaning and repairs are done. Open blinds, turn on lights, remove clutter, close toilet lids, and show the layout honestly. Include the outside, main rooms, kitchen, bathrooms, bedrooms, storage, laundry, parking, and outdoor spaces.
A strong listing cuts weak leads and helps serious renters decide if the home fits before they book a tour.
Step 6: Build a screening, lease, and move-in process
A ready property still needs a ready process. Before applications start, decide how you will handle inquiries, showings, applications, screening, approvals, lease signing, payments, and move-in.
Start with written rental criteria. These may include income rules, rental history, credit checks, job checks, background checks where allowed, occupancy limits, pet rules, and required documents. Use the same criteria for every applicant and keep records of each choice.
Your screening process should be fair and respectful. Confirm identity, review the application, verify income, call prior landlords when useful, and follow all laws for credit and background checks. If you use a screening service, learn what it checks, how applicants approve it, and what you must do if you deny an application based on the results.
Before you finalize screening and lease terms, review these landlord protection tips to reduce avoidable disputes and risks. Once you approve a tenant, use a lease that fits your property and local rules. The lease should clearly cover:
-
Rent amount and due date
-
Accepted payment methods
-
Late fees, if allowed
-
Security deposit terms
-
Lease start and end dates
-
Occupancy rules
-
Maintenance responsibilities
-
Utility responsibilities
-
Pet policies
-
Parking and storage rules
-
Entry notice procedures
-
Rules for smoking, guests, changes, and subleasing
-
Move-out expectations
Before you hand over keys, finish a move-in condition report with photos or video. Walk through the property with the tenant if you can, and note the condition of walls, floors, appliances, fixtures, windows, doors, bathrooms, kitchen, outside areas, and included items. Have the tenant sign the checklist or confirm it in your property system.
Create a simple welcome packet to cut confusion after move-in. Include how to pay rent, send maintenance requests, handle emergencies, set up utilities, use appliances or smart devices, parking, trash pickup, mail, JMB/MC or residents' association rules, and contact info.
A clear process helps tenants feel supported and helps you avoid mix-ups that can get expensive later.
Step 7: Organize finances and prepare for tax season from day one
Many first-time landlords wait until tax season to sort out their records. That usually leads to stress, missing receipts, and confusion. The better move is to set up your financial system before the tenant moves in.
Start by keeping rental income and expenses separate from personal money. Many landlords use a dedicated bank account for rent, repairs, supplies, utilities, and other property costs. This makes bookkeeping cleaner and cash flow easier to track.
Create digital folders for key records, such as:
-
Lease agreements and renewals
-
Applications and screening records
-
Repair invoices and receipts
-
Contractor estimates
-
Appliance warranties and manuals
-
Insurance documents
-
Property tax statements
-
Mortgage interest statements, if applicable
-
JMB/MC or residents' association records
-
Utility bills
-
Mileage logs for property-related travel, if applicable
-
Move-in and move-out condition reports
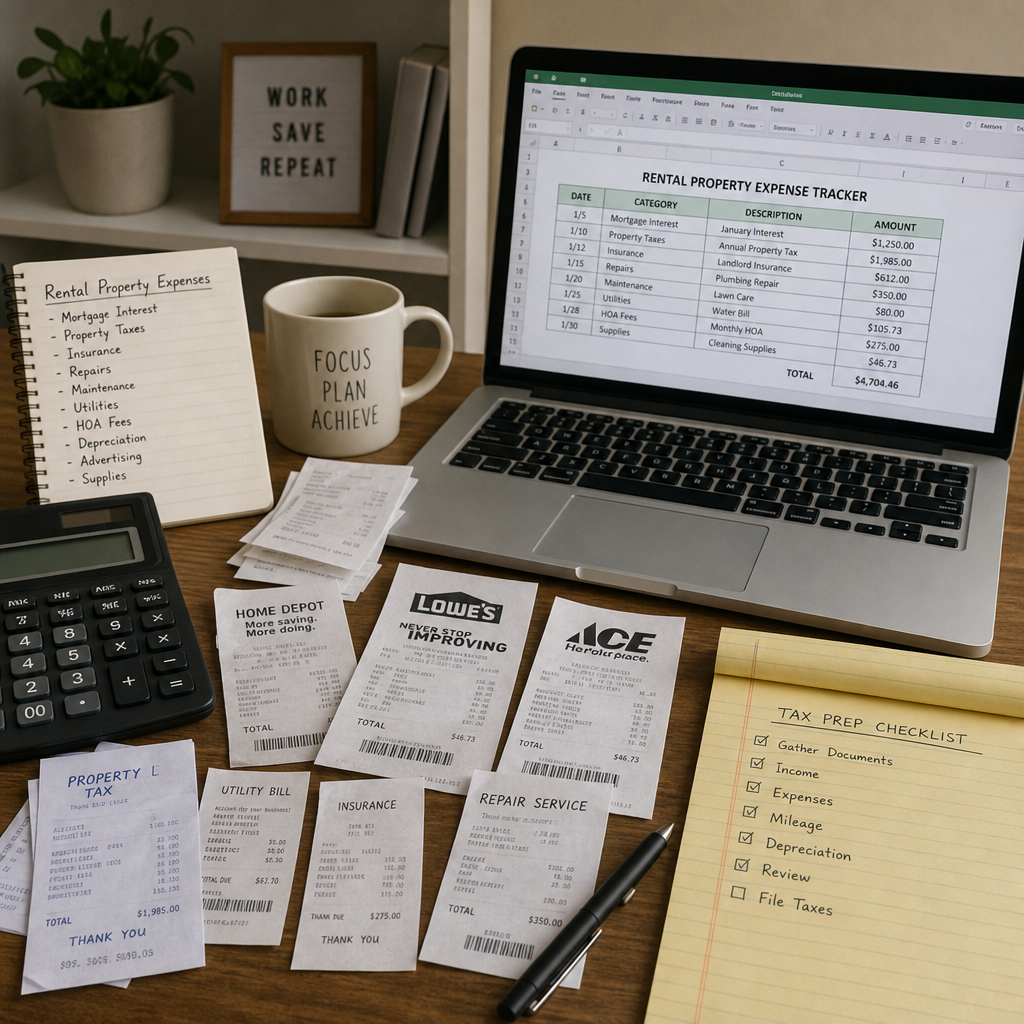
For rental property tax preparation, consistency matters. Record income when you get it and expenses when they happen. Group transactions throughout the year instead of trying to rebuild everything months later. Common groups may include repairs, maintenance, insurance, property taxes, utilities, advertising, professional services, management fees, supplies, cleaning, landscaping, and mortgage interest. Some costs may need to be handled differently, so talk with a qualified tax pro for advice for your situation.
If you plan to use software, compare choices based on your number of properties, your comfort with bookkeeping, your reporting needs, and whether you work with an accountant. The best tax preparation software for rental property is not the same for every landlord. Look for rental income tracking, expense grouping, receipt storage, write-off help, mileage tracking, bank account links, support for Section 4(d) rental-income reporting to LHDN, and easy export options for your tax agent.
If your rental activity is more complex, such as multiple properties, short-term rentals, major remodels, mixed personal and rental use, or partnership ownership, professional advice may be worth the cost. Software can help you stay organized, but it does not replace tax advice made for your case.
Good bookkeeping also leads to better business choices. When your numbers are current, you can see whether rent should change, whether a repair is becoming a repeat issue, how much to set aside for big repairs, and whether the property is meeting your goals.
Final walkthrough checklist before handing over the keys
Before move-in day, do one last review. This is your chance to catch small issues before the tenant finds them.
Confirm that:
-
All agreed repairs are complete
-
The property is clean and free of debris
-
Locks, keys, remotes, and access codes work
-
Smoke and carbon monoxide detectors are installed and working
-
Appliances operate properly
-
Plumbing fixtures do not leak
-
Heating and cooling systems work
-
Light bulbs are installed
-
Windows and doors open, close, and lock
-
Trash, mailbox, parking, and utility instructions are ready
-
The lease is signed by all required parties
-
Deposits and move-in funds are handled according to your lease and local rules
-
The move-in condition report is ready
-
Emergency contact and maintenance instructions are provided
This final review can save you from a rough first week of tenancy. It also shows tenants that you take the property seriously and expect the same from them.
Common mistakes to avoid
Even experienced landlords can miss details when preparing a rental. Watch out for these common mistakes:
-
Listing too early: Do not advertise until you know the property will be ready.
-
Skipping documentation: Keep photos, receipts, and written records.
-
Using vague lease terms: Unclear language can lead to disputes.
-
Ignoring local laws: Rules can change by location.
-
Setting maintenance reserves too low: Every property needs ongoing upkeep.
-
Choosing upgrades only for looks: Durability and ease of care matter more in a rental.
-
Mixing personal and rental finances: This makes bookkeeping and tax prep harder.
-
Relying on memory: Use checklists, folders, and written steps.
Avoiding these mistakes helps you run the property more professionally and gives tenants a better rental experience.
Make preparation part of your long-term rental strategy
Getting a property ready for rent is not just a one-time project. It is the start of your landlord system. The habits you build before the first tenant moves in will shape upkeep, communication, renewals, rent collection, and tax time.
A solid rental property preparation process should leave you with more than a clean unit. You should have a safer home, organized records, a clear lease, a steady screening process, a realistic rent, and a plan for ongoing management.
When you prepare carefully, you reduce surprises for yourself and create a better tenant experience. That mix helps a rental perform well over time.
Frequently Asked Question
Question: What is the recommended order to get a rental ready from start to finish?
Short answer: Follow a clear sequence so you do not miss critical items. Start with a full outside-in inspection and document everything with photos or video. Put fixes in this order: safety and use, then functional repairs, then cosmetic improvements, while choosing durable, easy-care materials. After repairs, do a deep clean inside and out. Next, confirm legal rules and insurance. Set a competitive rent and write an honest, specific listing with strong photos. Build your screening, lease, and move-in process: criteria, fair screening, a solid lease, a photo-backed move-in condition report, and a welcome packet. Organize finances and tax records from day one. Finish with a final walkthrough to confirm the home is truly move-in ready.
Question: Which cosmetic updates make sense for rentals, and how should I handle carpets and odors?
Short answer: Pick durable, low-maintenance finishes that show well without over-improving beyond your market. Good bets include washable neutral paint, scratch-resistant flooring where practical, simple and sturdy cabinet hardware, easy-to-replace blinds, LED bulbs and useful lighting, low-maintenance landscaping, and durable caulk and grout in wet areas. For carpets, decide between a deep clean and replacement based on stains, pet damage, and lingering odors. Bad smells can undermine otherwise good upgrades. As part of odor and curb appeal control, power wash where needed, clear cobwebs, clean exterior lights, trim overgrowth, and make sure trash bins are clean if they stay with the rental.
Question: What should my move-in condition report and tenant welcome packet include?
Short answer: The condition report should document, with photos or video, the state of walls, floors, appliances, fixtures, windows, doors, bathrooms, kitchen, outside areas, and any included items. Review it with the tenant and have them sign or confirm it in your system. The welcome packet should explain how to pay rent, send maintenance requests, handle emergencies, set up utilities, use appliances or smart devices, parking and storage rules, trash and mailbox details, any JMB/MC or residents' association rules, and who to contact. This clarity reduces post-move confusion and future disputes.
Question: How should I organize finances and records from day one?
Short answer: Keep rental finances separate. Use a dedicated bank account for rent and property expenses. Set up digital folders for leases, applications and screening records, repair invoices and receipts, estimates, warranties and manuals, insurance, property tax and mortgage interest statements if applicable, JMB/MC or residents' association records, utilities, mileage logs, and move-in and move-out reports. Record income when received and expenses when they occur, grouping transactions by repairs, maintenance, insurance, property taxes, utilities, advertising, professional services, management fees, supplies, cleaning, landscaping, and mortgage interest. If you use software, look for rental income tracking, expense grouping, receipt storage, write-off help, mileage tracking, bank links, support for Section 4(d) rental-income reporting to LHDN, and easy exports. Consult a qualified tax pro if your situation is complex or you are unsure how to categorize certain costs.
Question: What should my final pre-move-in walkthrough confirm?
Short answer: Verify that all agreed repairs are complete; the property is clean and debris-free; locks, keys, remotes, and access codes work; smoke and carbon monoxide detectors are installed and working; appliances and plumbing function properly with no leaks; heating and cooling work; bulbs are installed; windows and doors open, close, and lock; instructions for trash, mail, parking, and utilities are ready; the lease is fully signed; deposits and move-in funds are handled per your lease and local rules; the move-in condition report is ready; and emergency and maintenance instructions have been provided. This prevents a rough first week and sets clear expectations.
Continue your property journey with our FREE monthly newspaper, featuring the latest market insights and expert analysis. Subscribe to claim your copy!
Disclaimer: This article is provided for general information purposes only. The Edge Property Sdn Bhd makes no representations or warranties as to the accuracy, reliability, or completeness of the information, including its fitness for any particular purpose, to the fullest extent permitted by law. While every effort has been made to ensure the information is accurate and up to date as of the time of writing, it should not be relied on as the sole basis for any financial, investment, real estate, or legal decision, nor should it replace advice from a qualified professional who can consider your personal circumstances. The Edge Property Sdn Bhd accepts no liability for decisions made based on this article.